Adding a Printer 2014!
Network Printers
Network printers get installed according to computer names. A computer named in room MEDC should magically get the printer named MEDC installed to it. Sometimes names get changed and a printer does not show up. OR you just may need to print somewhere else... Yes, you can even print to the copier in room 200! EVERY teacher machine gets the workroom copier/printer in the mail room 200. (I do not know about the 3rd floor copier as I was never involved in that one.) Most of your desktop printers are also on this list.
This is the color printer if you want it - 634-MEDC-CIRC5255
KEEP IN MIND - You should make sure you have permission to use that printer.
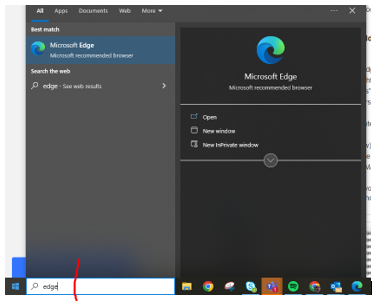
To install a NETWORK printer.
- Use Microsoft EDGE (Start menu - type Edge)
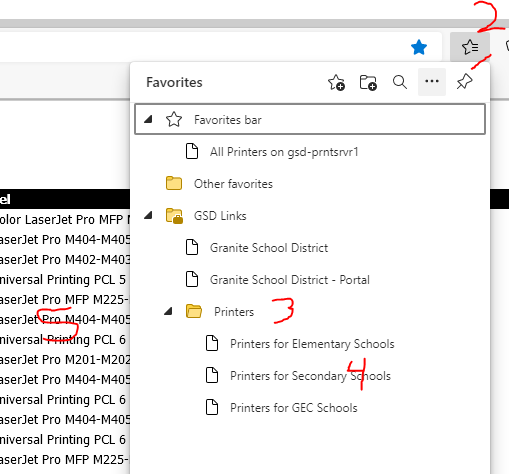
- Click BOOKMARKS (Star w/lines in top right) (see img. below)
- Click the folder "Printers"
- Click "Printers for Secondary Schools"
- A list of all networked "available" printers will show up
-xxxx is the room number where the printer is located. MEDC is the Media Center.
-hpxxxx is the name/type of printer it is.
Click on the Printer name.
Click on the word "Connect" and follow the prompts.
This will install the printer for YOU on this MACHINE only. The printer will NOT be there for other users.
This works for students too - BUT they do not know that. Please do not show them or they could print to your printer. If needed I can track who has printed to which printer. Chromebooks do NOT print!
|
|
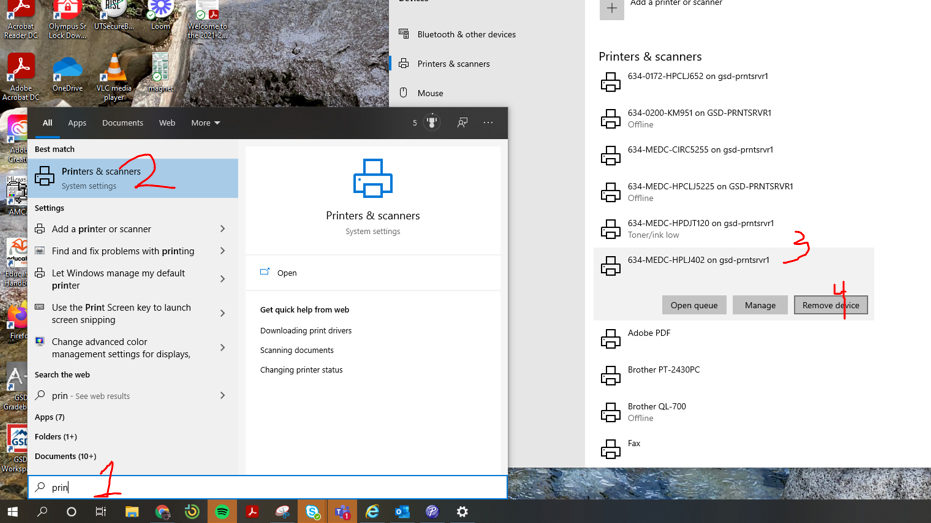
You can also remove printers!
- Windows Icon Search for "printer"
- Click on Printers and Scanners (hit enter)
- Click the printer to be removed.
- Click on "Remove Printer"